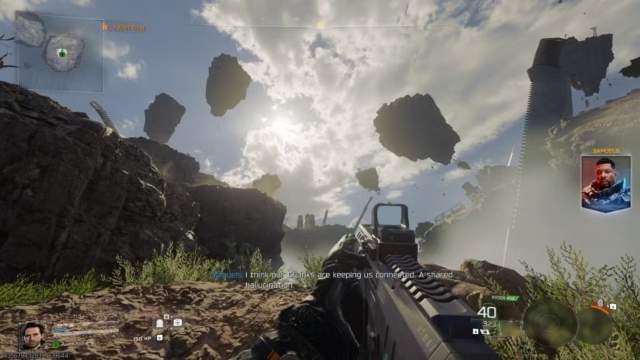
Black Ops 7 AK-27 God-Tier Build TTK Overwhelms All Rifles Within 38 Meters

Still frustrated by constantly getting wiped out in multiplayer gunfights This top-tier AK-27 build will dominate every match, reliably controlling the mid-to-long range. After seeing this, you’ll unlock a wheelchair-level gunfight experience. Purchase Black Ops 7 Bot Lobbies at MMOexp to level up your game and unlock all attachments early for an easy and enjoyable experience.

Version Tested! The AK-27 is the Hidden Gem of the Current Rifle

As the assault rifle with maxed-out damage and range in COD21, the AK-27 inherently possesses greater confidence in mid-to-long-range engagements than other similar weapons. Its controllable recoil also makes it easy for beginners to pick up and play.

Key Points Analyzing the AK-27’s inherent advantages, highlighting its overwhelming performance in TTK, range, and stability.

Suitable for New players who haven’t yet mastered weapon strengths, and experienced players who feel their rifles are underwhelming.

5 Attachments Lock Zero Horizontal Recoil! This core attachment essentially turns the AK-27 into a wheelchair gun.

This five-piece core attachment precisely targets the AK-27’s performance weaknesses, maximizing damage and range while completely eliminating the most annoying right-leaning horizontal recoil, allowing for headshots even at long range.

Key points This section breaks down the function of each of the five core attachments, including the SWF Tishina-11 muzzle and the 18.2-inch Vostok extended barrel, clearly explaining the performance improvement each attachment brings.

Suitable for Players seeking ultimate stability and primarily using a positional playstyle with mid-to-long-range holding positions.

Max out the Gunner’s Extension Card! Three attachments directly address the AK-27’s fatal weakness in mobility.

After unlocking the Gunner’s Extension Card, the additional three attachments elevate the AK-27’s previously lackluster mobility to the level of a top-tier rifle, eliminating the fear of being chased by submachine guns at close range, making it effective in both close and long-range combat.

This section focuses on Detailing the combination logic of the Epitaph extended magazine, buffer spring, and Caliban lightweight stock, balancing sustain, recoil control, and movement speed.

Suitable for Aggressive players who enjoy fast-paced gameplay and don’t want to be hampered by weapon mobility.

Fully equipped, its performance is maximized! This gun can cover 99% of multiplayer scenarios.

With this build, concealment is maximized without the minimap red dot, and its damage at 38 meters consistently surpasses all automatic weapons. Whether defending corridors, seizing advantageous positions, or rotating to engage, it handles everything with ease.

This section also focuses on Listing all the performance gains of the fully equipped AK-27 and breaking down its practical advantages at different engagement distances.

Suitable for Players climbing ranks and wanting to quickly improve their KD ratio.

Purchase cheap CoD Black Ops 7 Bot Lobbies at MMOexp to increase your game level and quickly unlock all attachments to immediately use this god-tier build.

Practical Tips

When you first start, practice recoil control for 10 minutes in the training range to familiarize yourself with the bullet trajectory after eliminating horizontal recoil. In actual combat, long-range bursts only require a slight downward movement of the mouse.

When playing on fast-paced small maps, you can replace the extended barrel with a short barrel to further improve aiming speed and reaction time in close-quarters combat.

When leveling up with double XP tokens, prioritize unlocking the extended barrel and the side precision grip; these are the core priority attachments for this build.

Summary of Core Benefits for Different User Groups

New Players Directly copy builds to avoid the trial-and-error costs of attachments, get a reliable weapon right away, quickly improve your gaming experience and avoid getting crushed.

Players Holding Positions A fully equipped AK-27 with zero recoil, reliably suppressing marksman rifles at long range, easily holding key passages and racking up kill streaks.

Aggressive Pushing Players The fully equipped AK-27 with extended gunner attachments, balancing damage and mobility, allowing for fast-paced pushes without switching to a submachine gun.

Ranked Players A wheelchair-like weapon adaptable to all scenarios, providing stable output regardless of map or mode, quickly climbing the ranks and reaching high scores.
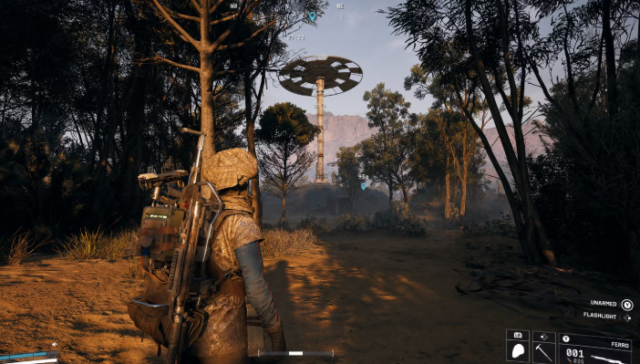
ARC Raiders Moss Location Guide: Best Farming Spots, Tips, and Efficient Loot Strategy

In ARC Raiders, resource farming plays a huge role in progression, and one of the most important materials introduced in the Riven Tides update is Moss. This rare natural resource is no longer just a minor crafting ingredient-it’s now a key requirement for major progression systems like the Avian Alarm project and essential crafting recipes.

What Is Moss Used For in ARC Raiders?

Moss is a rare Nature-based resource that has multiple uses across crafting and progression systems.

Its main functions include:

·Crafting medical items like Defibrillators

·Supporting expedition and project progression

·Healing utility in survival situations

·Contributing to seasonal objectives like Avian Alarm

Because of its importance, Moss has become one of the most sought-after mid-game resources in ARC Raiders, especially for players focused on efficiency and survival.

Unlike industrial materials, Moss does not come from crates or mechanical loot. Instead, it must be gathered from natural environments, making location knowledge critical.

Best Moss Location: Dried Riverbed (Riven Tides)

The most efficient and widely recommended farming location for Moss is the Dried Riverbed area in the Riven Tides map.

This area offers:

·Fallen logs that spawn Moss consistently

·Dense natural terrain with multiple spawn points

·High yield per run (often more than enough for objectives)

·Fast farming loops with minimal travel time

Players report being able to collect 12+ Moss in a single run, making it the most efficient farming route currently available.

The key advantage of this location is consistency-unlike random spawns elsewhere, the Riverbed offers predictable gathering points.

Secondary Moss Farming Locations

While the Dried Riverbed is the best option, there are several secondary locations worth exploring:

Hydroponic Dome Complex (Dam Battlegrounds)

This area contains cylindrical planters and nature-filled structures that frequently spawn Moss.

·Good alternative if Riven Tides is contested

·Higher player traffic but reliable spawns

·Often used for multi-resource farming runs

Wicker Basket Containers (Lush Blooms Condition)

During specific map conditions, Moss can appear in wicker baskets scattered across maps.

·Randomized but valuable bonus source

·Best used as supplemental farming

·Often combined with other resource runs

Vendor Purchase Option (Celeste)

Players can also obtain Moss directly from the vendor Celeste, limited to a small daily quantity.

·Useful for filling gaps

·Not efficient for bulk farming

·Best for quick progression support

Why Moss Farming Matters for Progression

Moss is not just a crafting ingredient-it is tied directly to progression systems that define mid-game advancement.

Key uses include:

·Crafting medical items like Defibrillators

·Supporting project progression systems

·Completing seasonal objectives

·Enabling survival-focused builds

Because of these uses, Moss has become a bottleneck resource for many players pushing into higher difficulty content.

Efficient farming ensures you don’t fall behind in crafting capability or raid survival potential.

Efficient Moss Farming Strategy

To maximize your farming efficiency, follow these optimized steps:

1. Focus on Riverbed Routes First

Always start with the Dried Riverbed in Riven Tides for maximum yield.

2. Plan Fast Collection Loops

Move in a straight line along fallen logs rather than exploring randomly.

3. Avoid High-Traffic PvP Zones

Moss farming is easiest when you avoid player conflict zones.

4. Combine With Other Resource Runs

Pair Moss farming with other material routes to maximize raid efficiency.

How Moss Connects to ARC Raiders Items Economy

As you progress through ARC Raiders, resources like Moss become part of a larger crafting economy.

Gathering it efficiently helps you:

·Maintain a steady healing supply

·Craft essential survival gear

·Support long-term build development

·Secure high-value ARC Raiders Items for later raids

The more efficiently you farm, the faster you can scale into advanced content where resource demand increases significantly.

Blueprint Progression and Long-Term Advantage

Beyond basic crafting, progression in ARC Raiders heavily depends on gear quality and blueprints.

Blueprints allow players to craft:

·Stronger weapons

·Better survival tools

·Higher-tier gear setups

·More efficient farming loadouts

Because of this, many players either grind resources or strategically choose to buy ARC Raiders Blueprints to accelerate their progression and reduce dependency on RNG drops.

When combined with efficient Moss farming, blueprint progression creates a strong, sustainable gameplay loop.

Final Thoughts

Moss may seem like a simple crafting material in ARC Raiders, but its importance grows significantly as you progress. With multiple uses in crafting, survival, and seasonal objectives, it quickly becomes one of the most valuable natural resources in the game.

Best Way to Get the Dragonfire Ward in Old School RuneScape

The Dragonfire Ward is one of the most powerful defensive shields in Old School RuneScape (OSRS), prized for its ability to mitigate dragonfire damage while offering strong all-around defensive bonuses. Whether you’re preparing to farm dragons, tackle endgame bosses, or improve your survivability in PvM, this shield is a major milestone item. In this guide, we’ll explain how to obtain the Dragonfire Ward, its benefits, and how to manage the cost using OSRS gold or even cheap OSRS gold strategies.

Complete Dragon Slayer II

The primary requirement for obtaining the Dragonfire Ward is completing the legendary Dragon Slayer II.

This grandmaster quest is one of the most challenging and rewarding storylines in OSRS. It takes players on an epic journey filled with:

·Dangerous enemies

·Complex quest mechanics

·Deep lore involving dragons and ancient civilizations

The quest culminates in a high-stakes boss fight against Vorkath, one of the most iconic dragon bosses in the game.

Why Dragon Slayer II Matters

Completing Dragon Slayer II unlocks:

·Access to Vorkath as a repeatable boss

·New high-level content and areas

·The ability to obtain dragon-related gear, including the Dragonfire Ward

Additionally, Vorkath becomes one of the best sources of OSRS gold, making this quest essential not only for progression but also for long-term profit.

Quest Requirements and Preparation

Before attempting Dragon Slayer II, players must complete several prerequisite quests, including:

·Dragon Slayer

·The Restless Ghost

·Other storyline quests tied to progression

Recommended Stats

To complete the quest comfortably, players should aim for:

·Combat level 90+

·Strong melee or ranged gear

·High Prayer and Hitpoints

·Plenty of food, potions, and supplies

This quest is not beginner-friendly, and proper preparation is critical. However, the rewards-both in progression and future OSRS gold potential-make it well worth the effort.

How to Obtain the Dragonfire Ward

After completing Dragon Slayer II, players gain access to Vorkath, the primary source of materials needed to create or obtain the Dragonfire Ward.

The ward itself is typically acquired through:

·Vorkath drops (components or tradeable items)

·Purchasing it from the Grand Exchange

Because Vorkath is heavily farmed, the Dragonfire Ward is often available for purchase, though it requires a significant amount of OSRS gold.

Dragonfire Ward in Combat

The Dragonfire Ward excels in multiple combat scenarios, making it a versatile addition to any player’s gear setup.

1. Dragon Boss Fights

The shield is specifically designed for dragon encounters. It is highly effective against bosses like:

·Vorkath

·King Black Dragon

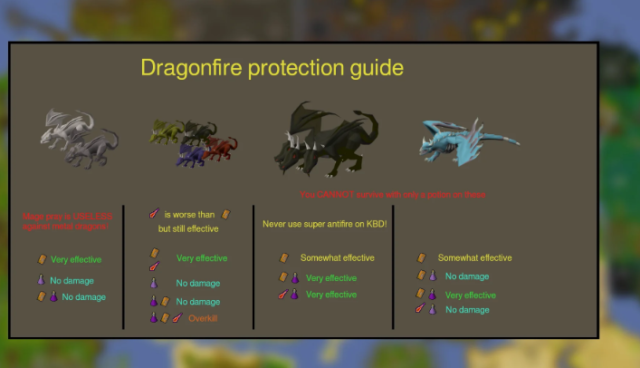
These enemies rely heavily on dragonfire attacks, which can deal devastating damage. The Dragonfire Ward reduces this damage, significantly improving survivability.

2. General PvM Activities

Even outside dragon fights, the Dragonfire Ward is a strong defensive option. Players commonly use it for:

·High-level Slayer tasks

·Bossing encounters

·Dangerous PvM zones

Its balanced defenses across melee, ranged, and magic make it a reliable shield for extended combat.

3. PvP Situations

Although not primarily designed for PvP, the Dragonfire Ward can still provide value in certain Wilderness scenarios. Its defensive stats help players:

·Tank incoming damage

·Survive longer encounters

·Protect valuable items

Managing Gear Costs with OSRS Gold

High-tier gear like the Dragonfire Ward requires a substantial investment of OSRS gold. Maintaining equipment, purchasing supplies, and upgrading gear all depend on a steady income.

Best Ways to Earn OSRS Gold

·Farming Vorkath (top-tier money maker)

·Killing Zulrah

·Completing high-level Slayer tasks

·Participating in raids

·Flipping items on the Grand Exchange

These methods are reliable but can be time-consuming. Many players spend hours grinding to afford upgrades like the Dragonfire Ward.

Using Cheap OSRS Gold to Progress Faster

For players who want to skip the grind, acquiring cheap OSRS gold can be an alternative way to accelerate progression.

This approach allows players to:

·Instantly afford high-tier gear

·Focus on PvM and bossing

·Avoid long farming sessions

However, it’s important to prioritize account safety and ensure compliance with game rules when considering external options.

Why the Dragonfire Ward Is Worth It

The Dragonfire Ward remains one of the most valuable shields in OSRS for several key reasons:

Dragonfire Protection

Its core strength lies in reducing dragonfire damage, making it essential for dragon bossing and hunting.

Strong Defensive Bonuses

The shield offers excellent all-around defense, helping players survive a wide range of combat scenarios.

Long-Term Value

Obtaining the Dragonfire Ward is a major milestone that reflects a player’s progression into high-level PvM content.

Players who invest in this shield often find that it dramatically improves their performance and confidence in difficult encounters.

Final Thoughts

The Dragonfire Ward stands as one of the most iconic and practical defensive items in Old School RuneScape. With its powerful dragonfire protection and strong defensive stats, it enables players to take on some of the toughest bosses in the game.

Top Franchise Mode Options and Challenges in MLB The Show 26

Jumping into Franchise Mode is one of the most rewarding ways to experience MLB The Show 26. Whether you’re aiming to dominate immediately or enjoy the grind of a long rebuild, choosing the right team at the start can completely shape your journey. Some organizations are built for quick success, while others demand patience, planning, and a long-term vision.

The most enjoyable teams to manage usually have a few key advantages:

A young core with high upside
A deep and promising farm system
Financial flexibility or manageable contracts
A balanced roster with both offensive and pitching potential

These factors give you room to grow while still staying competitive early on. You won’t need a full teardown, and you can focus on fine-tuning rather than rebuilding from scratch.

On the flip side, tougher teams often lack depth, carry heavy contracts, or have very little minor league talent. These franchises can still be fun—but only if you’re ready for a long-term rebuild.

Best Teams to Start With

Some teams in MLB The Show 26 strike the perfect balance between immediate playability and long-term growth.

1.Oakland Athletics

    The Athletics stand out as one of the most intriguing options this year. While they’ve struggled in recent seasons, their in-game roster offers a surprisingly solid foundation.

    Young talent headlines the lineup, giving you multiple players who can develop into stars. There’s enough offensive firepower to stay competitive early, and several prospects are waiting in the wings to strengthen the roster over time.

    Pitching is where things get interesting—it’s clearly the weak point, but that’s what makes this team fun. You’ll need to actively build a rotation through trades, development, or free agency, giving you a meaningful role in shaping the franchise.

    2.Chicago White Sox

      The White Sox are a great pick if you want a quicker turnaround without skipping the rebuilding experience entirely.

      They feature a mix of established talent and exciting prospects, giving you flexibility in how you approach the first few seasons. The lineup has enough depth to compete right away, while the farm system provides long-term upside.

      Pitching isn’t dominant at the start, but there’s enough potential for growth that you can mold a solid rotation with smart decisions. If you enjoy building a playoff contender within a couple of seasons, this team hits the sweet spot.

      3.Pittsburgh Pirates

        For players who love developing young talent, the Pirates are one of the most rewarding teams to use.

        They boast an exciting core built around elite prospects and emerging stars. The combination of high-upside hitters and a strong pitching pipeline gives you everything needed to construct a future powerhouse.

        The team is competitive enough to avoid constant losing, but still raw enough that your decisions truly matter. Watching your prospects evolve into All-Stars over multiple seasons makes this one of the most satisfying Franchise Mode experiences available.Step up to the plate with confidence—get your MLB The Show 26 Stubs from MMOexp and build the ultimate Diamond Dynasty roster today.

        Most Challenging Teams to Use

        Not every franchise is set up for success. Some teams require a full rebuild and a lot of patience before you’ll see results.

        1.Colorado Rockies

          The Rockies are easily one of the toughest teams to manage. The roster lacks depth, the farm system isn’t particularly strong, and financial flexibility can be limited.

          You’ll likely spend several seasons rebuilding through the draft and trades before even thinking about contention. This is a long-haul project suited for players who enjoy complete overhauls.

          2.Miami Marlins

            The Marlins present another difficult challenge. While there are a few bright spots, the overall roster lacks consistency and depth.

            Success here depends heavily on scouting, drafting, and careful contract decisions. It’s a slow rebuild that rewards patience and smart long-term planning rather than quick fixes.

            3.St. Louis Cardinals

              Once known for consistency, the Cardinals now offer a more complicated situation. The roster sits in an awkward middle ground—not strong enough to contend, but not weak enough to justify a full rebuild without tough choices.

              You’ll need to decide early whether to retool or completely reset the team. This makes them a more strategic, thinking-heavy Franchise Mode option suited for experienced players.

              Franchise Mode in MLB The Show 26 offers endless possibilities, but your starting team plays a huge role in how enjoyable your save will be.Don’t let the grind slow you down—MMOexp delivers fast, safe, and affordable buy MLB The Show 26 Stubs so you can focus on winning.

              If you want a smoother experience with faster results, teams like the Athletics, White Sox, and Pirates give you a strong foundation to build on. If you’re looking for a true test of your management skills, the Rockies, Marlins, or Cardinals will push you to your limits.

              Ultimately, the best choice comes down to your preferred playstyle—whether that’s chasing a quick championship or crafting a dynasty from the ground up.

              How to Defeat Firefly and Comet in ARC Raiders

              The surface just got a lot more dangerous in ARC Raiders. Two new ARC units — Firefly and Comet — have shifted the combat meta away from slow, cover-trading firefights and toward high-pressure, mobility-focused engagements. These enemies punish hesitation, poor positioning, and uncoordinated squads.

              The Firefly isn’t just another flying ARC. While older airborne machines hovered at predictable distances, the Firefly closes gaps aggressively and keeps constant pressure on its target. It excels at forcing players out of cover and punishing anyone who tries to sprint across open terrain.

              What Makes Firefly So Dangerous?

              Persistent target tracking

              Sustained flame damage over time

              Strong pressure in tight spaces

              Highly accurate aerial repositioning

              If you react emotionally instead of tactically, you’ll burn down fast.

              1.Break Target Lock with a Cloak

                A Photoelectric Cloak is one of the safest counters when things go wrong. It disrupts ARC targeting systems, giving you a short window to reposition or heal.

                This is especially valuable when:

                You’re low HP and being chased

                Multiple ARCs are active

                You need to disengage and reset

                Trying to out-damage a Firefly while exposed is rarely the right call. Survival first, damage second.

                2.Target the Yellow Fuel Tank

                  The Firefly’s biggest weakness is its exposed flamethrower fuel tank — a bright yellow canister mounted on its frame.

                  How to land the shot reliably:

                  Wait until it pauses or hovers

                  Use burst fire or semi-auto precision weapons

                  Avoid panic spraying

                  Destroying the tank can eliminate it almost instantly, saving ammo and preventing extended burn damage.

                  3.Never Flee Across Open Ground

                    Open terrain favors the Firefly. It dives, tracks efficiently, and keeps constant line-of-sight pressure.

                    Instead:

                    Move inside buildings

                    Break vertical sightlines

                    Force tighter angles

                    Indoors, its mobility is reduced, and you’ll have better opportunities to line up weak-point shots.

                    4.Use Lure Grenades to Control Chaos

                      Lure Grenades don’t kill the Firefly — but they buy time.

                      Best moments to deploy:

                      Reviving a teammate

                      Fighting mixed ARC groups

                      Securing an extraction zone

                      Think of them as tempo control, not a permanent solution.

                      Comet – The Rolling Detonation Machine

                      Where Firefly applies pressure over time, the Comet is pure burst lethality.

                      This heavily armored rolling unit charges targets and detonates with catastrophic force. If you’re caught inside its blast radius, survival chances are slim.

                      Why Comet Is So Lethal

                      Massive explosion radius

                      Thick frontal armor

                      Smart target prioritization

                      Self-destruct mechanic

                      It doesn’t chip away at your health — it commits to ending the fight in one decisive moment.

                      1.Force It to Open from Range

                        When engaged at mid-to-long distance, the Comet briefly opens, exposing its inner core.

                        Optimal approach:

                        Start the fight from range

                        Wait for the “open” animation

                        Focus fire on the exposed core

                        Missing these windows drags the fight out — and longer fights mean higher risk.

                        2.High Fire Rate Beats Raw Damage

                          Against Comet, damage per second matters more than heavy single shots.

                          Automatic weapons outperform slow hitters because:

                          The vulnerability window is short

                          You need consistent core damage

                          Burst timing is critical

                          Fast rifles and SMGs shine here.

                          3.Spread Out in Squad Play

                            The Comet is built to punish grouped players.

                            Smart squad positioning:

                            Maintain distance between teammates

                            Form a loose engagement arc

                            Avoid stacking on objectives

                            Spacing turns a potential squad wipe into a manageable recovery.

                            4.Remove Side Armor First

                              The Comet’s frontal armor is extremely durable. Its side panels, however, are more vulnerable.

                              Advanced positioning tips:

                              Circle-strafe if terrain allows

                              Coordinate crossfire angles

                              Focus on stripping side plating

                              Once armor breaks, the core becomes much easier to destroy.

                              5.Stay Calm During a Charge

                                When a Comet rolls straight at you, instinct says run. That’s not always optimal.

                                High-risk, high-reward tactic:

                                Hold position briefly

                                Shoot the exposed front weak point

                                Dodge at the last possible second

                                Executed correctly, this can end the fight quickly. Executed poorly — you’re scrap.

                                Loadout Adjustments for the New Meta

                                With Firefly and Comet in rotation, flexible builds are mandatory.

                                Recommended balance:

                                Precision weapon (weak-point control)

                                Automatic weapon (burst vulnerability damage)

                                Utility tool (cloak or lure grenade)

                                Adequate ammo reserves

                                Surface combat is no longer about specializing into one damage style — adaptability wins.

                                Protecting Your High-Value Gear

                                High-risk zones now carry greater punishment. Losing upgraded ARC Raiders Items to a Comet detonation hurts far more than losing basic gear.

                                If you’re pushing harder content tiers:

                                Optimize builds before committing

                                Practice weak-point discipline

                                Consider progression acceleration options like cheap ARC Raiders BluePrints to craft stronger loadouts faster

                                The goal isn’t just survival — it’s consistent extraction.