The Astral Ranger: A Ravendawn Online Build Guide

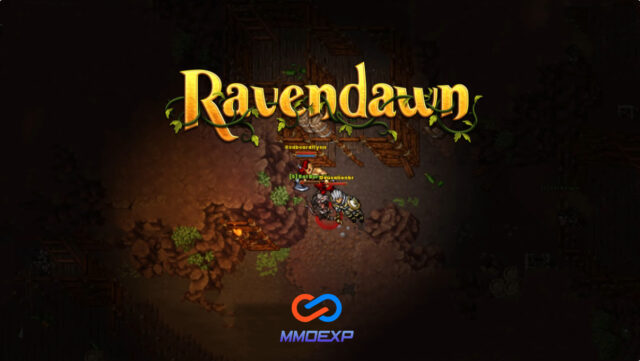
Greetings, fellow Ravendawn enthusiasts! Noori here, and today we’re diving into an exciting new build guide for all the adventurers out there. Ravendawn Online is a dynamic and evolving virtual world, and finding the perfect build to suit your playstyle can be both challenging and rewarding. In this article, we’ll explore the Astral Ranger build, a unique combination of Spiritual and Witchcraft trees, enhanced with the finesse of archery. I’ve spent some time experimenting with this build, and I’m eager to share my experiences, strategies, and thoughts on its potential.

Build Overview:

The Astral Ranger build is a delightful fusion of damage, shields, and light regeneration heals. This build is particularly well-suited for single-target encounters, excelling in both PvE and PvP scenarios. It thrives on the synergy between the Spiritual and Witchcraft trees, creating a powerful mix of damage-over-time (DoT) effects and precise archery.

Key Moves and Rotation:

  1. Arcane Pulse (Builder): This move serves as the primary builder, lowering the target’s defenses. Keeping three stacks on the opponent is crucial for maximizing damage output.
  2. Curse, Leech, Viper Arrow, Snare (DoT Rotation): These abilities contribute to the damage-over-time aspect of the build. The combination of curse, leech, and Viper Arrow, which scales off spell damage, inflicts substantial DoT on the target.
  3. Magic Rupture, Arcane Pulse, Arcane Torrent, Dawn Arrow (Main Damage Rotation): Switching to Magic Rupture, coupled with Arcane Pulse and Arcane Torrent, provides a powerful burst of damage. Int-based Dawn Arrow adds variety and confusion to the mix, disrupting opponents’ strategies.
  4. Whirlwind and Dawn Arrow (Defensive Tools): Whirlwind and Dawn Arrow, with their confusion effect, serve as defensive moves, providing survivability in challenging situations.

Passive Choices:

The initial focus on DoT-related passives provides additional damage and ensures sustained pressure on the enemy. As the build progresses, considerations for archery passives such as Exploitation and Marked for Death become viable. Additionally, exploring healing passives like Party Recovery and Healing Sphere can enhance the build’s sustainability.

Future Considerations:

As the build evolves, exploring archery passives like Exploitation and Marked for Death may enhance its effectiveness. Additionally, investing in Wind Strike, Spirit, and Haste, especially when equipped with cards synergizing with Dawn Arrow, could further optimize the Astral Ranger’s performance.

Stat Allocation and Gear:

Choosing a mix of plate and cloth gear, with a preference for a healing-focused plate, provides a balanced approach to defense and healing power. The gear currently utilized in the guide is T3 Ascendant, with an emphasis on intelligence, decks, wisdom, and the Use of Silver. The scepter and buckler combination enhances healing, making it a suitable choice for the Astral Ranger.

Notable PvP Moments:

The article includes footage of PvP encounters showcasing the Astral Ranger’s effectiveness in Harbor Island, a level-appropriate zone. The build demonstrates success in both 2v1 and 3v1 scenarios, emphasizing its viability for engaging player versus player content.

Conclusion:

The Astral Ranger build offers a refreshing and dynamic gameplay experience in Ravendawn Online. Its combination of Spirituality, Witchcraft, and archery creates a versatile character capable of dealing significant damage while maintaining survivability. As the build evolves and higher-level content is explored, adapting and experimenting with additional passives and abilities will be crucial to maximizing its potential. Whether you’re a seasoned player or a newcomer to Ravendawn Online, the Astral Ranger build presents an exciting opportunity to explore the vast possibilities within the game’s diverse class system. Happy adventuring!

The Hidden Settings Menu in Skull and Bones: Enhance Your Boating Experience

Today we’re setting sail to uncover some hidden treasures within the game’s settings menu. Prepare to embark on a journey filled with status effects, strategic insights, and multiplayer tricks to maximize your plundering escapades. So hoist the anchor and let’s dive right into it!

Unlocking the Hidden Settings Menu

Navigating through the interface of Skull and Bones, there lies a treasure trove of settings that can enhance your gameplay experience. First and foremost, we delve into the custom user interface, a realm often overlooked by many seafarers. Here, we unveil options such as displaying ship info, behavior icons, status effects icons, name labels, and distance labels. These settings provide vital information about your adversaries, enabling you to strategize your approach effectively.

Deciphering Status Effects

As any seasoned pirate knows, understanding status effects can mean the difference between victory and defeat on the high seas. From ablaze to flooded, torn sails to explosive damage, each effect carries its nuances and strategic implications. Ablaze inflicts high damage over time, floods and slows down enemy vessels, torn sails immobilize them temporarily, explosive damage wreaks havoc in a wide radius, and piercing damage bypasses armor for direct health depletion. Knowing how to apply these effects strategically can turn the tide of battle in your favor.

Expanding Your Crew

While sailing with a small crew has its advantages, why limit yourself to just a few shipmates? By employing a clever trick within the social interface, you can invite more players to join your crew, expanding your party beyond the usual limitations. This opens up exciting opportunities for larger-scale plundering and coordinated attacks against rival pirates.

Maximizing Rewards

In Skull and Bones, doubling your Pieces Of Eight can significantly boost your coffers. However, accepting such offers often exposes you to the risk of PvP encounters. Fear not, for there is a cunning strategy to mitigate this risk. By coordinating with your crewmates and forming a protective flotilla, you can safely navigate to your destination and claim your doubled bounty without fear of ambush.

The Power of Unity

They say there’s strength in numbers, and nowhere is this truer than in the world of Skull and Bones. Whether you’re hunting down legendary bosses or engaging in epic naval battles, having a crew of skilled comrades by your side can make all the difference. By banding together and coordinating your efforts, you can conquer the seas and carve out your legacy as formidable pirates.

Charting Your Course

As we sail towards the horizon, let your ambitions be as vast as the ocean itself. Whether you seek riches, glory, or simply the thrill of adventure, Skull and Bones offers endless opportunities for daring exploits and unforgettable tales. So gather your crew, adjust your settings, and set forth into the unknown. The seas await, and the promise of untold treasures beckons to those bold enough to seize it.

For more guides and all the latest news about Skull and Bones, check out MMOexp. Cheap Skull and Bones Silver for sale here!

Diablo 4 Patch 1.3.0a – Enhancements to Seneschal and Quality-of-Life Tweaks

Dear Diablo community,

We express our gratitude for the valuable feedback received since the recent launch of Season 3. Your insights have been instrumental in shaping the gaming experience, and as a result, we’re rolling out Patch 1.3.0a late tonight. This update addresses key concerns raised by players, focusing on improvements to the Seneschal Construct, Vaults & Arcane Tremors, and the Echo of Malphas. Detailed patch notes are available through the provided link.

Diablo IV Patch Notes — Blizzard News

We are actively monitoring feedback over the weekend, and another patch (1.3.1) is already in the works for next week. Expect the release of accompanying notes early in the upcoming week. Once again, thank you to the entire community for your valuable input during this season.

Game Updates:

Echo of Malphas:
Developer’s Note: Observing player behavior, we’ve noticed a tendency to use Pearls of Warding against the Echo of Malphas instead of Zoltun’s Warding. In response, we’re introducing Igneous Cores, a new item dedicated to summoning Malphas, eliminating the need to choose between extra protection in Vaults or confronting the boss. Furthermore, the Malphas encounter has been made more challenging, accompanied by increased rewards.

  1. Echo of Malphas level raised from 85 to 100.
  2. Echo of Malphas health pool increased by 30%.
  3. Introduction of Igneous Cores as a dedicated item for accessing Uber Vault and summoning Echo of Malphas.
  • Igneous Cores chance to drop from Vault Heralds and guaranteed drop from Son of Malphas in World Tier IV.
  1. Loot Updates:
  • Drop rate of Unique Stones from Malphas increased from 0.25% to 0.5%.
  • Unique Stones now have a 3% chance to drop from the chest after defeating the boss.
  • Defeating Echo of Malphas yields more Legendary items, with increased frequency of Item Level 925 drops.

The Seneschal:
Developer’s Note: Addressing feedback regarding the perceived lack of power in the Seneschal, we recognize that players may not have had sufficient opportunities to level up this companion. To rectify this, we’re implementing changes to provide additional sources for acquiring Governing and Tuning Stones, unlocking the Seneschal’s full potential.

  • Crafting Governing or Tuning Stones now consistently requires 200 Shattered Stone and 20 Iron Chunks, irrespective of level.
  • Max level Governing or Tuning Stones discovery rewards 150-200 Shattered Stone.
  • Governing and Tuning stones can now be obtained as rewards for completing Whispers.
  • Son of Malphas guarantees 2-3 Governing and Tuning Stones drop.
  • Stones awarded from Seneschal Stone Caches increased from 1 to 2.
  • Experience requirements for Governing and Tuning Stones reduced for a more natural ranking up experience.

Vaults and Arcane Tremors:
Multiple quality-of-life changes have been implemented to enhance the player experience in Vaults and Arcane Tremors.

  • Consuming a Pearl of Warding at a Statue of Zoltun Kulle now grants 10 stacks of Zoltun’s Warding, up from 3.
  • Max stacks of Zoltun’s Warding increased from 300 to 999.
  • Grace period for losing stacks of Zoltun’s Warding when hit by multiple traps extended from 1 second to 1.5 seconds.
  • Heralds of Malphas now guarantee a Legendary item drop starting at Level 26, with a 15% chance for a second Legendary item.
  • Knockback removed from all Obelisk Hazards.
  • Chests now appear after completing a Vault’s ending encounter, dropping a guaranteed Legendary item starting from level 26+, with a 35% chance for an additional Legendary item.
  • Elemental Dart hazards’ projectile speed reduced by 20%.
  • Hitboxes for floor-based Elemental Grate and Spike hazards reduced by approximately 15%.
  • Spout hitbox for Elemental Pillars reduced by roughly 15%.

Bug Fixes:

  • Fixed the issue where the Gatehall would not display on the map for PlayStation players.
  • Fixed an issue where the Brazier could not be interacted with during certain circumstances in the Drums of the Vault quest.
  • Addressed the problem where the Beckoning Thunder Horse cosmetic was invisible for Druid players.
  • Rectified the discrepancy between damage and visual effects for floor traps in Vaults.
  • Various stability and performance improvements.

We appreciate your continued support and hope these updates enhance your Diablo 4 gaming experience. MMoexp provide you the best Diablo 4 Items and D4 Gold, 30% off, welcome!

Elden Ring: A Journey Through the Most Powerful Weapons

Elden Ring, the highly anticipated action RPG developed by FromSoftware and published by Bandai Namco Entertainment, has taken the gaming world by storm. As players explore the vast and mysterious lands of the game, one aspect that stands out is the arcane power that can be harnessed through various weapons. In this article, we delve into the arcane side of the Elden Ring, exploring five major areas and uncovering the most powerful Arcane-scaled weapons for each.

The Arcane Essence

Arcane, a mysterious force in Elden Ring, is intricately tied to status effects such as poison and bleeding. Unlike other stats, Arcane scales with these effects, making weapons with passive amounts of these statuses particularly potent. Our journey begins with the Bandit class, chosen for its high Arcane stat, setting the stage for a thrilling exploration.

The Ruva Dagger and Great Knife

Venturing into the unknown, share their experiences, from facing challenges to obtaining the powerful Ruva dagger. This dagger, paired with the great knife, proves to be a deadly combination, swiftly dispatching formidable foes like Patches. The author emphasizes the importance of weapon choice and strategy in overcoming the challenges posed by Elden Ring.

Fort Height and the Blood Ash of War

The journey continues to Fort Height, where acquires the Blood Ash of War, known as Bloody Slash. This powerful weapon becomes a key element in the arsenal, proving effective against enemies like Godric. The narrative details the strategic choices made, showcasing the author’s mastery of the game mechanics.

Conquering Limb Grave and Leria

With Limb Grave under control, moves on to Leria, obtaining the Volcano Manor invitation. The focus shifts to acquiring the Moonh Halir, a weapon obtained after hours of dedicated farming. MMOexp acknowledges the weapon’s unique properties and its potential for future use, demonstrating the depth of Elden Ring’s weapon variety.

Gail Tunnel and General Ron

As the journey progresses, faces challenges in Gail Tunnel, acquires the Twin Blade Talisman, and confronts General Ron. The narrative highlights the meticulous approach to utilizing specific Talismans and weapons, showcasing a balance between strategy and combat proficiency.

Conquering Kalid and the Vulgar Militia Saws

Kalid presents new opportunities and challenges, leading to the acquisition of the Vulgar Militia Saws. Details the meticulous process of enhancing these weapons, emphasizing their effectiveness in combat. The narrative also explores encounters with mini-bosses and the importance of armor and Talisman choices.

The Snowy Alps and Inquisitor Giza’s Wheel

The journey takes a chilling turn into the Snowy Alps, where obtains the Snake Katana and faces Inquisitor Giza. The focus shifts to Giza’s Wheel, described as one of the author’s favorite weapons. The narrative illustrates the weapon’s strengths and its impact on challenging encounters.

The Capital, Edgar, and the Wheel’s Power

The narrative unfolds in the Capital, where the author challenges Edgar, Priest of Blood, and acquires the Blood Talisman. The Axe Talisman is introduced, enhancing the power of Giza’s Wheel. The journey through Elden Ring continues, showcasing a diverse range of weapons and strategic choices.

Climbing the Difficulty Ladder: Melan, Mog Land, and Beyond

The article guides readers through the increasing difficulty levels of Elden Ring, exploring areas such as Melan, Mog Land, and beyond. The narrative highlights encounters with powerful bosses, the acquisition of the Fire Scorpion Charm, and the strategic use of weapons like Giza’s Wheel and the Blood Ounce Fang.

Godkin Duo, Horu, and the Final Confrontation

The climax of the journey unfolds as faces formidable foes, including Godkin Duo and Horu. The narrative details the strategies employed, emphasizing the significance of weapon choice, buying Elden Ring Runes, and tactics. Mastery of Elden Ring’s mechanics is evident as they navigate through intense battles, leading to the final confrontation with Ragon and Eld, the Beast.

The Ultimate Triumph: Becoming the Lord of All

In the concluding sections, reflect on the triumphs and challenges faced throughout the Elden Ring journey. The article touches on the variety of weapons used, the importance of armor and Talismans, and the satisfaction of emerging victorious in the game’s epic battles. The narrative concludes with a nod to the future, hinting at the upcoming Elden Ring DLC and the age of fracture.

In summary, this article provides a comprehensive and engaging exploration of Elden Ring’s arcane power, weaving a tale of conquest, strategy, and triumph. From the early challenges faced in Limb Grave to the climactic battles against powerful bosses, the author’s journey through Elden Ring serves as a testament to the depth and complexity of FromSoftware’s latest masterpiece.

Bridging the Gap in Dark and Darker’s Equipment Disparity

In the labyrinthine realm of Dark and Darker, where gear disparities often dictate the course of battles, a seasoned player proposes a solution to level the playing field. The idea centers around gear reforging—a mechanism that allows players to tweak a single stat on their gear, providing a middle ground for those who eschew trading and the formidable, top-tier kits often assembled through trade.

The player draws attention to the transformative experience brought about by the low-tier gear restriction, highlighting the enjoyment derived from PvP encounters when the chasm between gear levels narrows. With a passion for the High-Roller (HR) mode, the player acknowledges the challenges posed by facing opponents who invest considerable time and gold in acquiring optimal sets through trade. The disparity becomes particularly pronounced in clips circulating on platforms like Reddit, showcasing victories that often involve unconventional strategies, such as the use of invisibility potions.

To address this issue, the player proposes gear reforging as a potential solution—a mechanism that could offer players the ability to alter a single stat on their equipment. The concept, while straightforward, comes with certain limitations to maintain balance. Players might be restricted to reforging one or two pieces of gear, and the item’s quality could be a determining factor, perhaps requiring it to be at least of blue or purple quality.

The player envisions gear reforging as a valuable addition to the game, not only offering a solution to the gear divide but also serving as a potential gold sink. To add an extra layer of complexity and engagement, the idea of utilizing specific gems for different stats is introduced. Rubies could be associated with vigor and maximum health, while sapphires might influence will and magic damage. The player emphasizes the importance of allowing players to select the exact stat they wish to reforge without resorting to a randomized system. However, a touch of luck could still be infused into the process, determining the amount of the chosen stat with a degree of randomness.

While expressing overall satisfaction with the game’s direction, the player notes recent changes, such as increased stats on gear, which have skewed fights toward players who invest time in trading for top-tier sets. The proposed gear reforging system aims to inject more skill-based elements into encounters, offering a compromise for those who prefer self-found gear and those who relish crafting meticulously tailored kits through trading.

The player remains hopeful for the introduction of a self-found HR queue in the future, expressing anticipation for any potential testing phases. Yet, even with this prospect on the horizon, the proposed gear reforging system stands as a potential boon, not only leveling the playing field for those who prefer self-found gear but also catering to players who delight in the art of crafting perfect kits through hours of dedication. Make it possible for players to invest their energy and Dark and Darker Gold to get more pleasure.