FIFA 23 Strategies for Beginners

FIFA 23, the latest installment of the popular football video game franchise, provides an immersive and realistic virtual football experience. For beginners, the game can be both exciting and overwhelming, as they navigate the intricacies of gameplay and try to find success on the virtual pitch. In this essay, we will explore some strategies that beginners can employ to improve their gameplay and enhance their chances of success in FIFA 23.

Start with the Basics

As a beginner, it is crucial to start with the basics and familiarize yourself with the game’s controls and mechanics. Spend time in the training modes and tutorials, which provide valuable information on passing, shooting, dribbling, and defending. Understand the different types of passes, such as short passes, through balls, and lobbed passes, and learn when and how to use them effectively. Similarly, practice shooting techniques and develop a sense of timing and precision. Mastering the basics sets a strong foundation for success in FIFA 23.

Choose a Team that Suits Your Style

In FIFA 23, each team has its own strengths and weaknesses. As a beginner, it is advisable to choose a team that suits your preferred style of play. If you enjoy playing possession-based football, a team with good passing attributes might be a suitable choice. If you prefer a more direct and fast-paced approach, a team with strong attacking players and pacey wingers could be a better fit. Understanding the strengths of your chosen team allows you to play to their advantages and devise strategies that align with their style of play.

Focus on Building Solid Defense

Defense is a critical aspect of success in FIFA 23. As a beginner, it is essential to focus on building a solid defensive structure. Pay attention to positioning your defenders, tracking runs, and timing tackles. Avoid recklessly charging into challenges, as this can leave gaps in your defense and open up scoring opportunities for your opponent. Instead, prioritize maintaining defensive shape and intercepting passes. By developing a disciplined defensive approach, you can frustrate your opponents and reduce their scoring chances.

Utilize Set Pieces

Set pieces, such as corners and free kicks, can be game-changers in FIFA 23. As a beginner, it is beneficial to spend time practicing and mastering set piece techniques. Learn different types of corner kicks and experiment with various delivery options. On free kicks, practice both shooting and crossing techniques to create scoring opportunities for your team. By effectively utilizing set pieces, you can gain an advantage over your opponents and potentially score vital goals.

Study and Analyze Opponents

In FIFA 23, understanding your opponents’ gameplay patterns and strategies is crucial. Take the time to observe their playing style and identify any weaknesses or vulnerabilities. Pay attention to how they build up attacks, their preferred passing lanes, and their defensive tendencies. By studying and analyzing your opponents, you can anticipate their moves and make better decisions on the pitch. This information allows you to adjust your own strategies and exploit any weaknesses in their gameplay.

Practice Skill Moves

Skill moves are an exciting aspect of FIFA 23 and can be used to deceive opponents and create scoring opportunities. As a beginner, it is beneficial to practice a few skill moves that are relatively easy to execute. Moves like the ball roll, heel-to-heel flick, and fake shot can be effective in beating defenders and creating space for shots or passes. However, it is important to use skill moves judiciously and not rely on them excessively, as they can be easily anticipated and countered by experienced players.

Play Online and Learn from Experienced Players

One of the best ways to improve in FIFA 23 is by playing against experienced players online. While it may be intimidating at first, competing against skilled opponents exposes you to different playing styles and strategies. Observe their gameplay, analyze their techniques, and learn from their decision-making. Don’t be discouraged by losses, as they provide valuable learning opportunities. Instead, use each game as a chance to improve and refine your skills.

Conclusion

FIFA 23 offers beginners a thrilling and immersive football gaming experience. By following the strategies outlined in this essay – starting with the basics, choosing a suitable team, focusing on defense, utilizing set pieces, studying opponents, practicing skill moves, and playing against experienced players – beginners can enhance their gameplay and increase their chances of success, win the match and get FIFA 23 coins rewards more. Remember, improvement in FIFA 23 comes with practice, perseverance, and a willingness to learn from both victories and defeats. So, put on your virtual boots, embrace the challenges, and enjoy the journey to becoming a formidable player in FIFA 23.

OSRS Motherlode Mine Overview

One of the best additions to OSRS was the ‘Motherlode Mine’, which was released in the year 2015. Numerous players consider this mine as a convenient way to level up their Mining, because, unlike other mining spots where you have to frequently change locations, you can without much of a stretch level up all the way to 99 here. Even though it doesn’t provide any additional experience, you can make a good amount of RS Gold once you’re at a good level (150k/hour), which isn’t the best money-making method on Old School RuneScape, but it’s quite refreshing because you benefit both ways; gaining levels and profiting from the process. Let’s take a dive into this motherlode mine guide.

Requirement & Location

The only requirement that you need to enter the motherlode osrs mines is level 30 in Mining, and once you’re at level 72, you can enter the upper floor by paying a hundred golden nuggets to Prospector Percy. However, once you pay the amount, you can stay there for an indefinite time. The Motherlode osrs Mine is located in the Dwarven Mine, which can be entered through a cave entrance just northeast of the Falador Mining Guild.

Strategy

The process is quite straightforward after gaining access to the motherlode mine osrs. You will have to mine the veins that are within it, and each one that you successfully mine will give you 60 experiences. However, experience per hour will keep increasing as you reach higher levels and use better tier pickaxes. Unlike the normal variant of veins, these veins can be mined up to 26 times before they disappear, but that’s not always the case, because they can also disappear after a single strike. That’s why it’s known as a semi-AFK method, as you have kept an eye out every now and then.

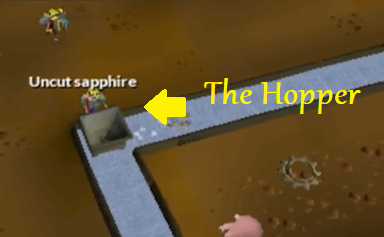
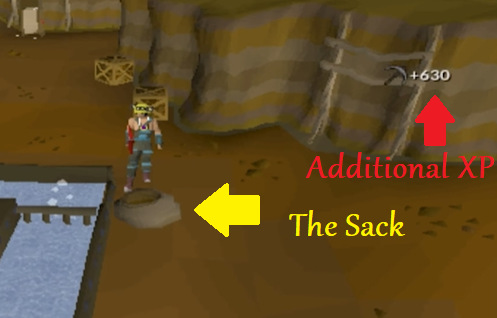
While you mine these veins in the motherlode mine osrs, you will also obtain ‘Play-Dirt’ fragments, which need to be cleaned off at a later phase by adding them to a hopper. During the process, the dirt will travel down the hopper and fall right into a sack which can be searched to obtain standard ores. The maximum that you can add to a hopper is 81 pay-dirt. However, there’s another method where you can add an extra amount of it to overfill the sack, allowing you to reduce time consumption and speed by the experience gained.

Since you’ll be carrying a hammer along with you, the best strategy would be to do two runs with 27 pay-dirt in your inventory, and then two more with 26 pay-dirt, which would result in the sack to have a total of 80 pay-dirt in the sack. Finally, drop the hammer and mine to obtain a full inventory (28) of pay-dirt and add it into the hopper (pick your hammer after that). The game mechanics will gladly accept the amount and you’ll have a total of 108 pay-dirt in the sack. As mentioned above, the maximum amount that it can hold is 81, but you can trick the game mechanics using this strategy.

Finally, once the pay-dirt has been cleaned, you can open the sack to obtain the ores. The ore that you receive will depend upon the level that you mined it at, and likewise, receive additional experience apart from what you’ve received while mining.

Things You Need to Know While Mining at The Motherlode Mine

At level 30, you’ll be able to obtain Coal from the sacks, but with no additional experience in Mining. At level 40, you’ll be able to obtain Gold Ores, with an additional experience of 15 for each one. At level 55, you’ll be able to obtain Mithril Ores, with an additional experience of 30. At level 70, you’ll be able to obtain Adamantite Ores, with an additional experience of 45. Finally, at level 85, you’ll be able to obtain Runite Ores, with an additional experience of 75.

There are often times when random events occur in the Motherlode, and they must be tended to before returning back to your mining work. The first event is Rockfall, where rocks will start to fall down and block your path (it may also deal damage). You’ll have to mine these rocks to gain additional experience of 10.

Every now and then, the water wheel that is connected to the hopper breaks, and it’s your duty to fix it using a hammer. If you didn’t bring one along with you, simply search the nearby crates to obtain one. Fixing the wheel provides an additional experience in Smithing, which is about 1.5 times your current Smithing level. To save up inventory space, a good tip would be to mine without a hammer in your inventory, because you can obtain one at any time from one of the crates near the hopper.

As I’ve already mentioned above, if you want to reach shift to the upper levels of the Motherlode Mine, you’ll need to pay 100 golden nuggets to Prospector Percy. These nuggets can be obtained while mining with a 2.74% chance to receive one. Apart from that, you can also purchase a variety of items from the prospector using golden nuggets. The items include Soft Clay Pack, Prospector Boots/Helmet/Legs/Jacket, Bag Full of Gems, Coal Bag, and Gem Bag. You can also upgrade your pay-dirt sack at a cost of 200 golden nuggets.

That concludes our motherlode mine guide!

D2R Power Leveling Tips

As a beginner, the following guide will tell you everything there is to know to power level quickly through the game.

Similar to other MMORPGs Diablo 2 Resurrected also gets harder as you progress further in the game. After you’ve passed down the first difficulty level (normal), you’ll notice that you’re getting the EXP that you used to, so the guide ensures that you get the complete advantage for each run.

Where can I level up?

Depending on your character’s level, there are quite a few locations that offer higher Exp than the normal area runs. It’s because these locations have bigger packs and unique monsters. The whole concept of power leveling is to visit these areas and defeat the monsters that you encounter along the path. Once you’re done, you can exit the current game and create a new one to repeat the process until you’re at your desired level. It may be a repetitive method, but it’s the quickest way.

Levels 1 to 15

Start by repeatedly clearing Tristram, where you need to activate the portal to the location during the Search for Cain quest. The quickest way is to teleport to the Stone Field through the waypoint system, and then search for the portal. Now, head inside and clear out the monsters you encounter. A good suggestion is to focus on the elite mods that spawn in the middle area.

Levels 15 to 24

At level 15, start clearing Tal Rasha’s Tombs (Act 2), which is in the Canyon of the Magi (waypoint), for d2r leveling guide solo. However, you’ll need to first finish the Summoner quest to reach the canyons. The strategy is to enter each of Tal’s tombs and kill the monsters. Once you’re done with one tomb, you can exit and head to the next. The location includes fake tombs too, so you need to keep looking.

Level 24

At level 24, complete the Rite of Passage quest (normal difficulty level) to obtain a level up, as well as the ability to perform Baal runs. For maximum EXP, it’s best that you wait till your level 24, and only then start the quest, for the d2r leveling guide solo. You’ll be at level 25 once the quest is successfully completed.

Levels 25 to 40

Start clearing Chaos Sanctuary repeatedly, or alternatively, do Baal runs. Since Baal runs require fewer efforts, it’s more recommended by players. You can start by teleporting to the Worldstone Keep Level 2 through the waypoint, and then heading towards the Throne of Destruction, for d2r leveling guide. Once you’re there, complete the monster waves, exit the game, and then repeat the process. You don’t need to kill Baal for Exp, but you can approach him if you’re looking for Diablo 2 item drops.

Speaking of Chaos Sanctuary, you can start by teleporting to the ‘City of the Damned’ through the waypoint, and then heading to the sanctuary. Once you’re there, defeat the enemies as well as the elite spawns, and then focus on Diablo for additional loots.

Level 40

At level 40, complete the Rite of Passage quest (nightmare difficulty level) as you’ll be strong enough to be successful, for the diablo 2 resurrected leveling guide. You need to complete acts 1 to 5 for the second time, and then complete the quest to reach level 41.

Levels 41 to 60

Focus again on Chaos Sanctuary and Baal runs on nightmare difficult after completing Rite of Passage. The mechanics are the same for every difficulty, but only harder, for d2r leveling guide.

Level 60

Now, complete Rite of Passage in hell difficulty as you’ll be able to face the horror at level 60. However, you’ll need good equipment because the enemies are stronger. If you’re having trouble with the quest, you can farm runes from The Countess to help you out.

If you’re playing online, you can ask your friends to assist you with power leveling through hell difficulty. Some might offer the assistance in exchange for Hell’s Forge quest runes, so don’t go for that because these Runes can help you get started with your equipment. It’s worth noting that the player may also scam you, so if you’re doing it, do it with someone you trust.

Levels 61 to 99

Finally, clear Chaos Sanctuary and do Baal runs reputedly after completing Rite of Passage at hell difficulty, for diablo 2 resurrected leveling guide. Also, it’s best that you only level up to level 90 or 94 because for the further levels, you’ll need to grind a lot in those locations.

Note: you’ll need to complete the following quests to complete every act – Sisters to the Slaughter (Act 1), The Horadric Staff (Act 2), The Arcane Sanctuary (Act 2), The Seven Tombs (Act 2), Khalim’s Will (Act 3), The Blackened Temple (Act 3), The Guardian (Act 3), Terror’s End (Act 4), Rite of Passage (Act 5), and Eve of Destruction (Act 5).

New World Build: Life Staff Healer Guide

Life Staff Healer’s build revolves around healing expeditions, alongside supporting your party members with AOE damage utilizing the Ice Gauntlets. This PVE build is primarily for expeditions, but you can always use the same for other challenging PVE locations, such as Elites. It’s even quite agile in terms of PVP scenarios. So, if you have been seeking a good Life Staff Healer build, then the following guide is perfect for you.

Working on the build

When your party pulls in a group of dreadful mobs, you are tasked to drop an Ice Storm spell to AOE and slow them down. While that’s happening, you swap to your Life Staff to begin healing the party members. During the phase, you will either use Sacred Ground or Beacon depending upon the enemy that you are up against, and then utilize Light’s Embrace to spot heal whenever necessary for this New World Life Staff Build.

When Ice Storm’s cooldown is over, you can swamp back to help the DPS-based players. You will also be utilizing Entombed for mana regeneration if you feel that you’re about to run about. The spell Ice Pylon can create a frosted area, which can be used to benefit from passive spells, such as Refreshing Frost.

Attributes

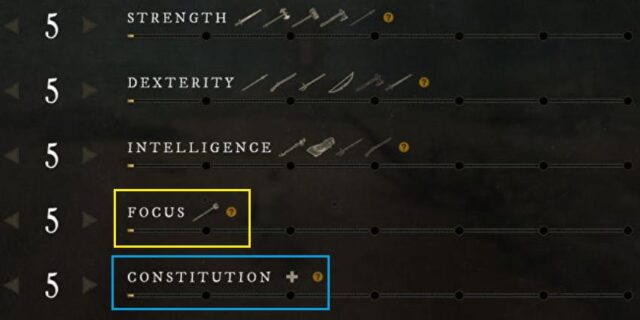
Since your main weapon is Life Staff and the healing is dependent upon the weapon’s damage, you will be adding a significant number of points into Focus. Adding a few points into Intelligence is also a wise move to enhance the mechanics of Ice Gantlets, but it’s best you use an Amber Gem for them, for this New World Healer Build. Doing so changes a % of the gauntlet’s damage to nature, which is a better damage type than ice as it increases the overall damage and is less resisted on average.

You can also place some of your points into Constitution so you don’t end up dying quickly. A good recommendation would be to take Constitution up to around 50 for an increase in consumable healing.

Life Staff Skills

Sacred Grounds

Sacred Grounds creates an overtime AOE heal in a certain location. It can either be base-off the positioning of the other party members or simply target the ground.

Beacon

Beacon creates an overtime AOE heal over the enemy, which means any party member near it will get healed for this New World Healer Guide. It works best when you are fighting against a hard boss in expeditions since it wears off when the enemy dies, so you wouldn’t want to waste it on easier mobs. You can also place a Beacon on your tank if needed.

Light’s Embrace

Light’s Embrace is a spot heal that is utilized to top up the entire part or heal those who have taken a significant amount of damage. It has a short cooldown, but the cost of high that it uptakes is more.

Absolved

Absolved is a ‘must-have’ passive ability as it allows you to attack the enemies with your Life Staff without losing an ounce of mana. As time goes by and your progress, you can eventually take the Divine Blessing capstone on the healing skill tree for your New World Life Staff Build.

Ice Gauntlet Skills

Ice Storm

Ice Storm deals powerful damage in terms of AOE while slowing down the enemy in the targeted area. You can use this to offer a helping hand to your party in damaging the enemies, and then swap to Life Staff when healing is required.

Entombed

Entombed is an amazing skill to recover mana rapidly. You can use it to feel that your mana is about to run out, or when you have less mana and your party requires a significant amount of heal. You can also use it to AGGRO the enemies in dangerous situations.

Ice Pylon

Ice Pylon isn’t often utilized as a Life Staff Healer in the early content, but you can add it once you are familiarized with the build. It can inflict some damage and create a frosted area to get benefits with passive-specific abilities, such as Quick Frost and Refreshing Frost.

Weapons

The only two weapons that you need to seek after as a Life Staff Healer are Ice Gauntlet and Life Staff. Look into the weapons that offer maximum damage that increases your damage and the healing capabilities of your Life Staff for this New World Healer Build. Weapons with Focus, Crit Damage, and Crit Damage are also a wise approach to further boost the stats. Similarly, it would also be nice to have Outgoing Healing on a Life Staff in this New World Healer Guide.

Make sure that you drop an Amber Gem into your Ice Gauntlet to maximize its capabilities, and place a diamond into your Life Staff to increase its healing. These two aren’t ‘must-haves’ but they can make your equipment more effective.

Armor

Having equipped with lighter armor increases the healing that you perform, so that’s what you should likely consider. You can always opt for medium if you are looking for extra protection and feel that you won’t be able to survive the damage. A good suggestion would be to equip light armor entirely, but with the light chest piece replaced with a medium variant to increase the protection and the healing power.

You need to watch out for Focus and Constitution prior to purchasing an armor set, as it increases your healing and damage, alongside survivability. Besides that, hold anything that helps in reducing the cooldown limit, as the gaps between them can have you and the entire party killed.

OSRS The Grand Tree

The Grand Tree takes you on an adventure to save the Gnome population. In this quest, you need to uncover the mystery behind why the tree is dying. You’ll be tasked by King Shareen to assist the Tree Gnomes in finding a solution.

Quest Requirements

To complete the quest, you’ll need at least 25 Agility, and decent combat stats to defeat a Level 172 Black Demon. Speaking of items, you’ll need 1,000 OSRS Gold, which is if you haven’t already helped Femi with her Spirit Tree plans during the Tree Gnome Village quest.

You’ll also need Stamina Potions as there is a lot of running around, as well as OSRS Items to travel between Hazelmere and Tree Gnome Stronghold. You can always use the Nightmare Zone teleport to get to Hazelmere.

Walkthrough

Start by heading towards the Grand Tree to speak to King Narnode Shareen (Ground Floor). You’ll be taken to the underground to help revive a dying tree. You’ll also be given a Bark Sample and Translation Book which needs to be taken to Hazelmere.

You can either use the Watchtower Teleport, or Castle Wars Teleport (Ring of Dueling), or take the Carter Ship and walk to Port Khazard, and then head south.

Hazelmere

When you try speaking to Hazelmere, you won’t quite understand him. So, start using sign language to communicate. He’ll take a look at the Bark Sample in your inventory and leave a message that decodes “A man came to me with the King’s seal. I gave the man Daconia rocks. And Daconia rocks will kill the tree!”

Head back to the King and inform him about the message by choosing the right option. He’ll now mention how someone used his seal to get the Daconia Rocks from Hazelmere, which is the main cause of the problem. The King will now ask you to speak to Glough, who is in the house south of the tree.

Investigation

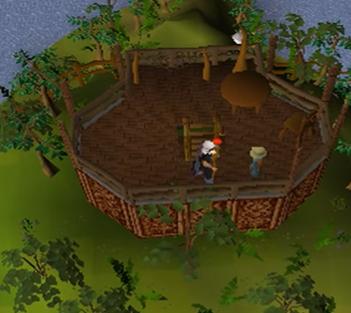
Head back to the King and inform him about the prisoner held by Glough. Ask to see the prisoner and he’ll talk to you can find him on the top floor of the Grand Tree. The name of the prisoner is Charlie, and he’ll inform you that the rocks were given to him by Hazelmere because Glough asked him to do so.

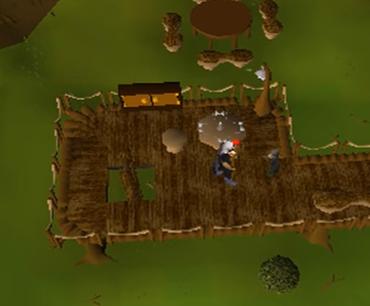
He will now ask you to search Glough’s house for evidence. Head there and search his cupboard to find a journal. Speak to Glough who has now sent guards after you. He’ll throw you in the prison cell next to Charlie.

Speak to Charlie again to learn about the Ship Yard on Karamja island. He’ll give you a password to access it (Ka-Lu-Min). Now, the King will appear and apologize for the imprisonment. He’ll advise you to quickly escape using the Gnome Glider on the top floor. Fly to the Ship Yard by talking to the Pilot.

Ship Yard

The Glider will crash somewhere west of the Ship Yard. So, head east, past the Level 53 Jogres to reach there. You’ll be stopped at the yard by one of the workers as you try to open the gates. Tell him that you were sent here by Glough while giving him the password given to you by Charlie.

Now head to the southern docks to speak to the Foreman. Tell him that Glough sent you, alternatively, just kill him. If you choose to speak to him, you’ll need to answer a few questions to claim your standing.

You’ll notice a Charter Ship nearby, which can be used to get to Port Khazard. You’ll need 720 Runescape Gold on you to travel. The Stronghold’s entrance will be blocked, but there’s always a way around it. So, go to the Tree Gnome Stronghold’s gate and speak to Femi, asking her to sneak you in. Alternatively, use the Spirit Tree in the village to get inside.

Anita

When you return to the king with the Foreman’s note, you’ll be told to leave for being as paranoid as Glough. Now, head to the top of the Grand Tree and speak to Charlie again. He’ll suggest you speak to Glough’s girlfriend. You can find her in the house near the swamps, northwest of the Grand Tree.

Head upstairs to get a key from her that needs to be returned to Glough. Use the key on the chest in Glough’s house to get notes about his plan to seize Gielinor. Take them back to the King, but even with such evidence, he won’t choose to believe the conspiracy taking place.

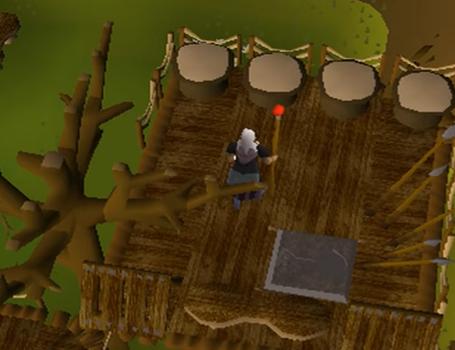
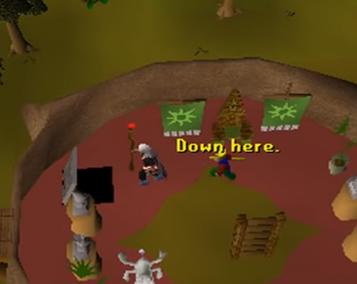
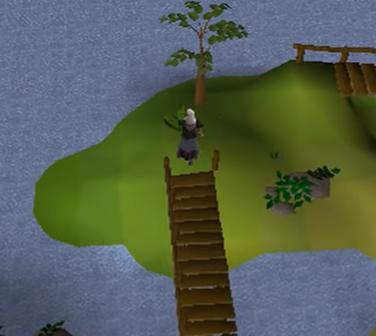
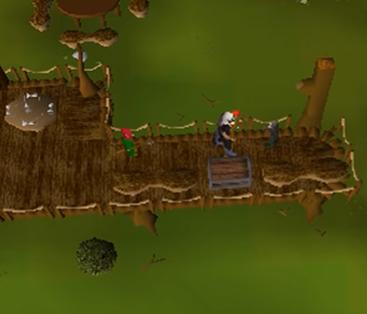
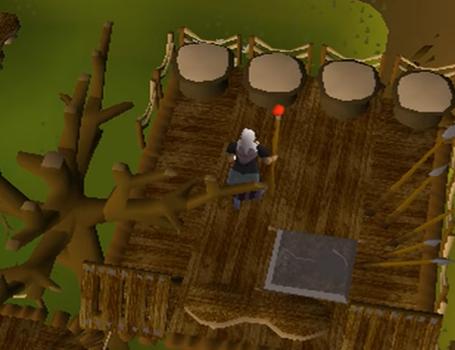
He’ll tell you that they only found twigs forming the word TUZO at his place. With translation, it actually means OPEN. Take the twigs back to Glough’s place and head up to the watchtower. Climb the tree east (25 Agility) to come across a stone with four pillars around it. Use the Twigs on it to turn the gears. A trap door will open for you to head down.

Black Demon

With Glough following behind you, you’ll soon approach a level 172 Black Demon. You can either safe-spot it from a distance or choose to directly fight it using Melee. Once slain, take the passage ahead until you reach a ladder with King Shareen standing at the other end.

Speak to him about what just happened to only know that he still doesn’t believe you. However, he’ll send a scout after Glough to bring him back. Knowing the truth, the King will finally believe you and apologize for what happened. Finally, bring the last Daconia Rock back to the King to complete the quest.